 |
|
   |
 |
|
Defender Stargate / Missile Command Mash-Up
I always wanted a panel that could play Defender and still fancied one that included my trackball to play Missile Command so I decided to fuse the two designs. This is how it turned out.
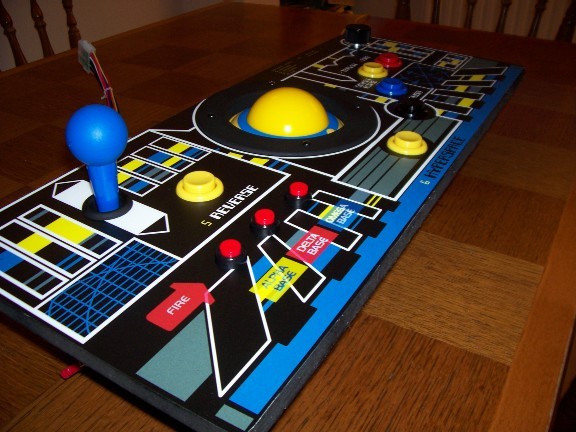
I started the design by dowloading some Defender inspired artwork and changing the colours to match the existing cabinet scheme.
Next I drew a circle to border the trackball. I found an exhaust vent for a portable air conditioner which acted as a surround. This face plate was later spray painted with several coats of black enemel.

As my panel is deeper than the defender CPO, I moved the joystick and reverse buttons up to allow room for the mini pushbuttons. I couldn't find the Atari volcano buttons, so these would have to do.
There is very little of the Missile Command artwork actually in this design because the trackball is so dominant . I made what there was slightly transparent so it wouldn't clash with the Defender art too much. Also note the spinner semicircle on the right.
The graphics were just printed on photopaper for play testing however the final version was printed by MameMarquees.

The panel is swappable using a molex connector (the trackball uses a serial port so I'll need a separate connector).

My attempts at wiring an ATX connector were terrible so I ended up using an ATX motherboard extender. This worked fine except that the wires weren't always wired 1:1 to the identical pins. (probably doesn't matter for its intended purpose on a motherboard, but caused me a fair bit of confusion).
I moved the Ipac from the underside of the control panel to the side of the cabinet. The board was held on by PCB feet vpurchased from Gremlin Solution. The molex connector is permanently wired to the IPac to allow the same PCB to be used for the two control panels.This had the added benefit that pounding the buttons on Track & Field no longer knocks the circuit bord free of its mounts.

The Crayola trackball is held tight by a base plate bolted to the top and tightened with wingnuts. The bolts are countersunk into the panel and need filling

When the sticks arrived I experimented with the height a little. This was a little low.

I used a spare pushbutton surround to finish the joystick hole once I'd found a good height, as this poor photo shows.
 
The spinner on the right fits into a button sized hole and connects to a tiny interface board.
 
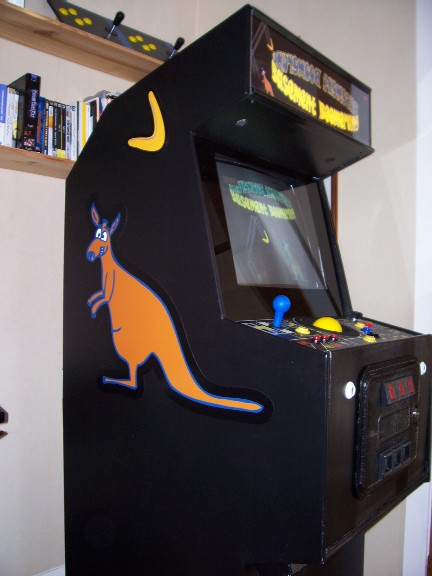
This is how it looks in its cabinet. Shame the photo is so duff, the finish doesn't really look that bad.

This is the side art also printed by MAMEMARQUEES. My son drew the kanagaroo and I traced it with a marker pen and then into a vector format using a program called Vector Eye. I used a trial version of Adobe Illustrator to colour in the drawing and clean up and enlarge the image

The whole cab!
The original control panel also needed a molex connector, so I took the opportunity to tidy up the wiring. The old rats nest was causing problems with wires working free of their terminals.
 |